Pulse welding is a process that is used in Gas Metal Arc Welding (MIG) and Gas Tungsten Arc Welding (TIG).
The pulse process works by quickly varying the current between a high and a low amperage when welding. These two amperages are known as the peak and background amperages. A welding machine with pulse welding capability will automatically vary the current at a set speed once the pulse mode is activated. A pulse mode may be able to pulse over 200 times a second (200 PPS).
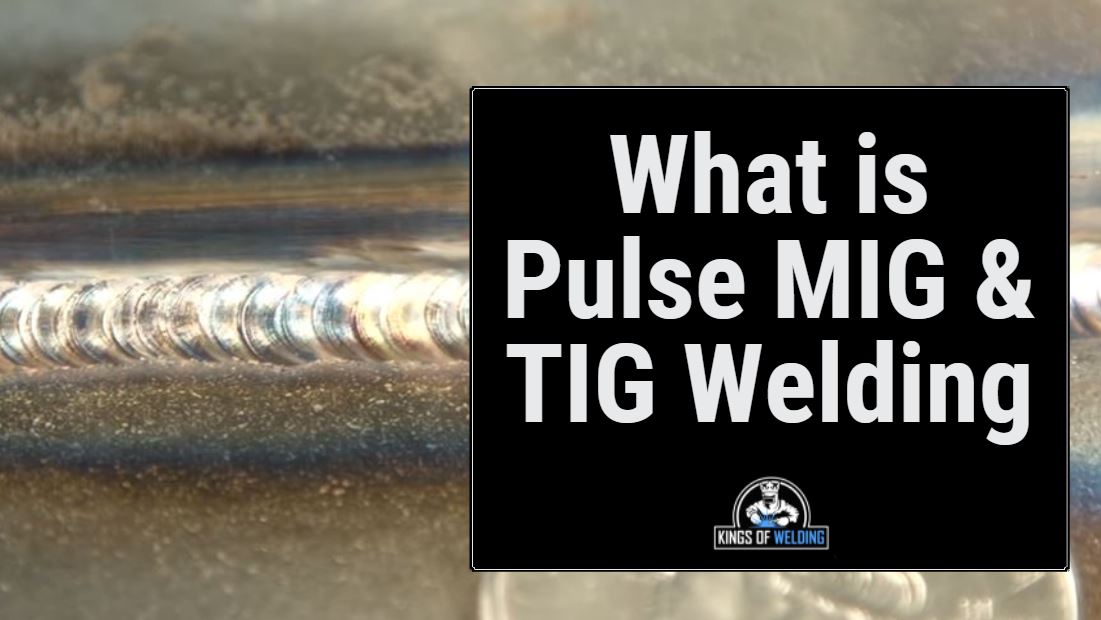
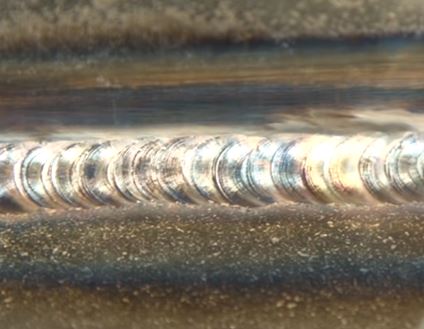
The result is essentially a very close series of tack welds which join together to make an aesthetically pleasing welded seam.
Pulse welding is a great a way of welding fast with less heat input. There is less heat transfer when pulse welding because the arc is not continuous, making it a good choice for welding thin metals that are prone to warping or blow through.
Contents
Advantages of pulse welding
- Spatter free welding. Pulse welding creates clean welds that are free from any spatter, eliminating the need for any post-weld cleanup.
- Less heat input allows for less risk of distortion on thin metals but the same weld penetration can be obtained.
- Aesthetically appealing welds that are neat and have a nice rippled effect.
Applications of pulse welding
Sheet metal
Pulse welding has lower heat input which makes it a good choice for welding thin sheet metal because there is less risk of distortion. If you have a weld where you’re falling through then turn the pulser on for some extra control.
Out of position
The weld puddle is cooler and smaller when pulse is activated which helps to prevent the puddle from dripping if you are welding overhead.
Attractive welds
Pulse welding produces a ripple effect across the weld bead which is really nice to look at. Art made with TIG welding will often be done with pulse because it’s so cool to look at.
Filling holes
Pulse can be used to fill holes because the heat can be better controlled which means there’s less risk of accidentally adding too much heat and blowing through the hole even more.
Precision welding
Pulse welding allows the welder to keep the arc more focused and more easy to control whilst still providing penetration, perfect for precision welding.
Touching up
If you have a weld that’s a bit ugly looking you can go back over it in pulse mode to make it look better.
Heat sensitive metals
Stainless steel and titanium have a low thermal conductivity which makes pulse a good choice for pulse welding. Aluminum has a high thermal conductivity and needs higher heat input so pulse is less practical.
Pulse MIG Welding
When using the pulse MIG setting, the current will alternate at your chosen speed and amperage. (Note: check that your MIG welder has pulse capability in its specifications).
When the current is at its highest, a drop of metal from the end of the MIG wire will be deposited into the weld pool, this is known as spray transfer. The electrode never touches the weld.
When the current is at the background current, it will maintain the arc but filler wire will not be deposited into the weld pool.
Pulse MIG creates no spatter but allows for penetration without too much heat. Pulse MIG is a good choice for thin materials, however, TIG still gives more attractive welds and better control if you have the option to do so.

Pulse TIG Welding
There are a couple of different ways you can pulse TIG weld with a TIG welder.
The first way is by consistently dabbing the filler metal into the weld. Try setting the pulses to one per second and add the filler metal on each high pulse in a rhythmic motion. Move the torch along when it’s on the low pulse.
This consistent rhythmic technique of adding filler metal will help you to create muscle memory and improve your welding technique without using pulse.
Secondly, instead of adding the filler metal manually you can simply lay your filler metal over the weld joint, place the electrode tip at the leading edge and run the torch across the weld. This method won’t give you the attractive “pulse weld” look of layered spot welds but is pretty easy to do.

Pulse Welding Settings
There are lots of different settings you can use when pulse, there is no one answer but the main things you have to think about are setting the following:
Pulse Frequency
Pulse frequency or pulses per second (PPS) is how many times the pulse goes through a full wave in one second. For example, 1Hz means that the pulse has one peak amperage and one low amperage in one second.
0-10PPS is considered low frequency pulse and over approximately 30PPS is considered high frequency pulse.
Higher frequency pulse has a number of advantages including:
- Narrower and deeper penetration
- More focused arc
- Agitates the weld pool for better fusion of butted metals
- Allows for faster welding
- Easier to observe because the flickering is too fast to notice
Low frequency pulse in the range of 10 to 30Hz can be more dangerous to weld because the arc flickers really fast and can cause headaches and eye strain. When the pulse is at 300HZ you won’t notice the flickering.
We recommend that users try out with a pulse frequency of 1Hz but pump it up to 30-40 once you have tried it out.
Duty cycle
Duty cycle (or on time) will be the percentage of the time that the arc is in the high mode versus the low mode. For example, at 30% on time the arc will be at its highest 30% of the time vs 70% of the time at its lowest.
Amperage
Set the amperage to approximately double what the settings would be if you weren’t activation the pulse setting. This is because the amperage is an average of the high and low settings. It’s better to set it higher because you can just use a bit of power with your pedal and press harder if you need to.
Set the background amperage to approximately 30%. A good general starting point to try out is the rule of 33: 33PPS, 33% on time and 33% background amperage.